Showing posts with label tutorial. Show all posts

Friday, December 6, 2013

Cloth Napkin Tutorial


Over the week-end, I made up a batch of new cloth napkins for our family.  They were really quite easy to make, so I thought I'd write up a quick tutorial.

I personally like my napkins on the bigger side, so I started by cutting out the main fabric into 15 x 15 inch squares.

I had some shot cotton in my fabric stash that is a bit thinner than regular quilting cotton, and cut out 1 inch strips of this, joining them all together at the ends to make a continuous strip of the 1 inch wide fabric.I'm sure you could also use regular cotton for the edging, or even linen.

Once again,

15" x 15" main napkin fabric

continuous 1" narrow strips of "binding" or edge fabric.

On the back side of the main napkin fabric, I sewed the 1 inch strip all along the edge.

The corners, I treat as you would a quilt binding, stopping a quarter inch from the end, leaving the end of the needle in the fabric (or not), folding the corner up creating a 45 degree fold, then sewing down the other edge.

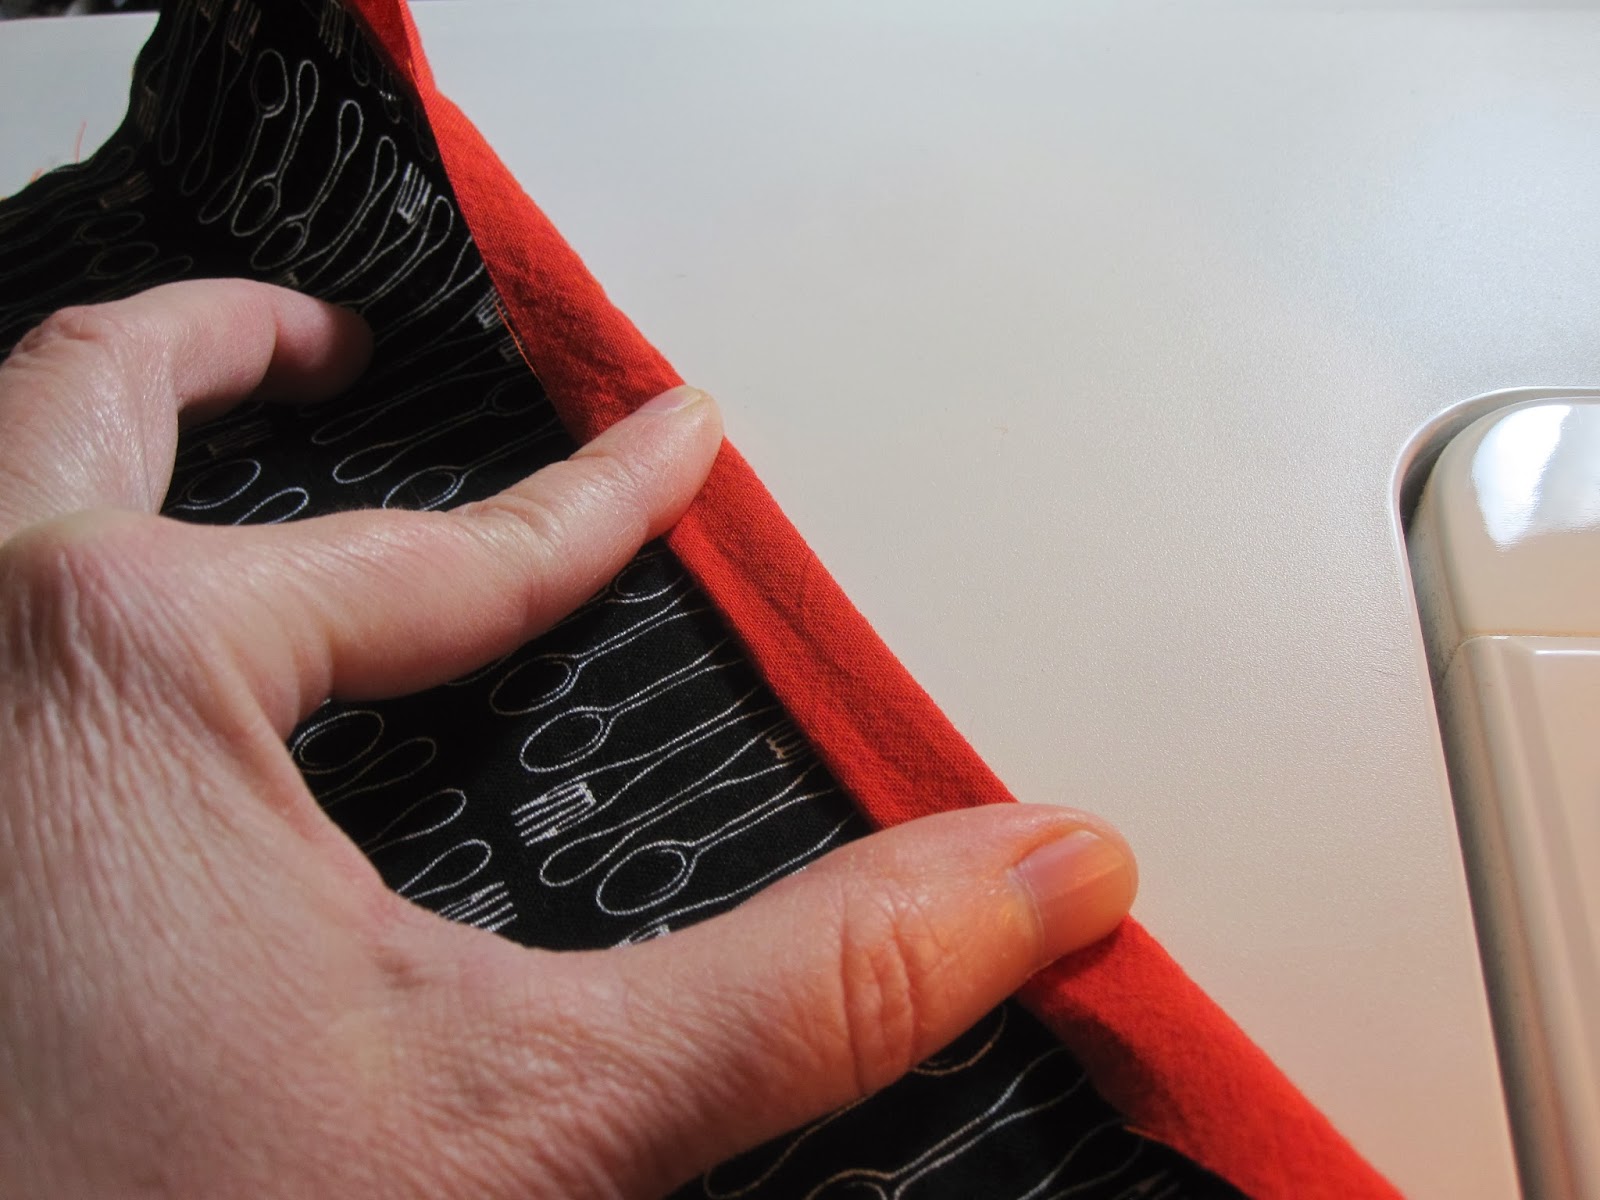
Then I flipped the napkin over, and folded the edge of the binding edge over to meet the edge of the seam, then the whole thing over to the front, or a double fold hem that encloses the raw edges.


Then it was just a matter of stitching a decorative stitch with a contrasting thread color onto the top!
Here's how I mitered the corners on the front:


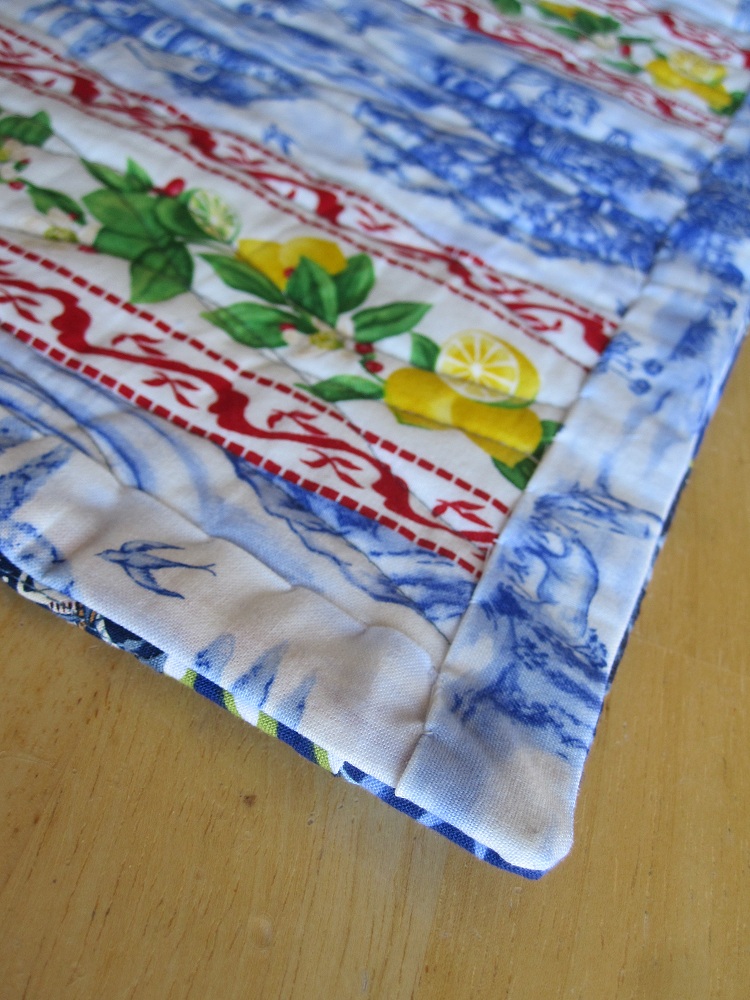
And finally, here's what the back looks like.  It's actually more of a facing than a binding.  I think it's much easier.
Enjoy!


Wednesday, March 13, 2013

WIP Wed: Honeycomb / Hexagon Machine Quilting Tutorial


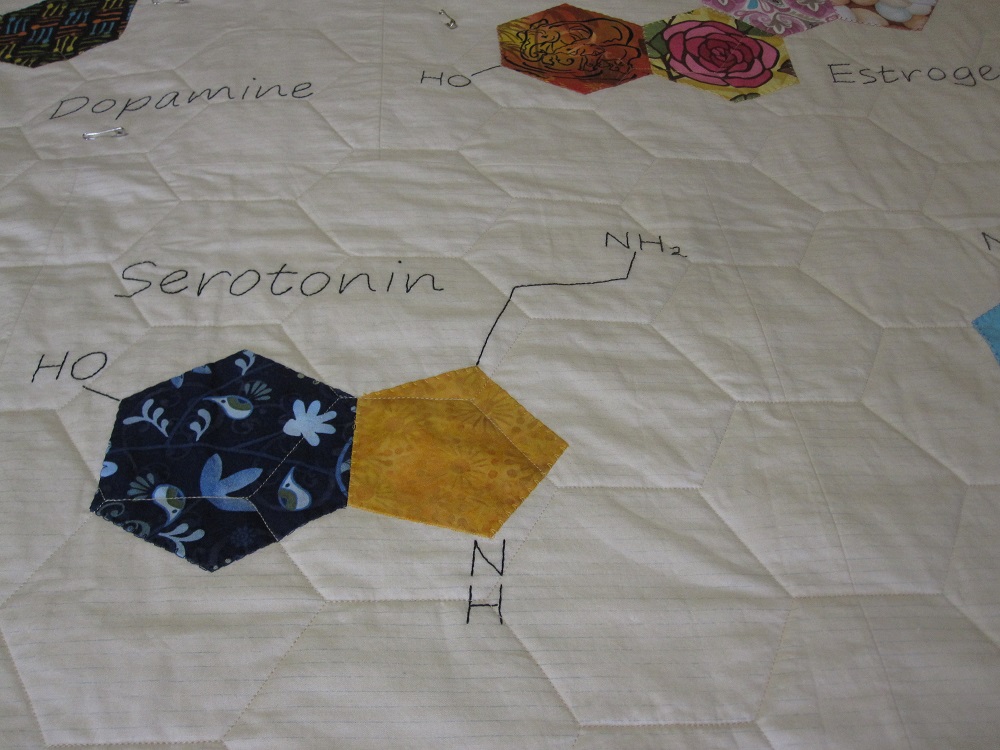
I'm about a third done quilting my Organic Chemistry Quilt.  I decided to do a simple grid all over the quilt, but also wanted to use hexagons on it.  After looking all over the Internet for ideas, and pretty much coming up with nothing, I decided to create my own.

One great thing about this quilting design is that just about anyone can do it with a walking foot.  All I did is to use the same cereal box template that I used to make the appliqued chemical hexagons, and used a plastic pot scrubber (my makeshift "Hera marker") to trace the outline of the next shape to stitch on.

Hopefully this give you an idea of how I am quilting it.  I tried to use chalk marker at first, but the white is almost impossible to see on such a light background, and the few I did in a peach colored chalk didn't easily "erase" with water or a lint roller.  I've had colored tailor chalk stain previous quilts, so immediately stopped using it.  This "Hera marker" leaves a crease that lasts just long enough to guide my stitches over!

It'll take a while to do this, but I find that I really really like this design.  I bet it'd be super easy on a long arm machine too.

Of course now that the design is taking shape, I may not be able to resist free motion quilting inside some of those "empty" hexagons ;-).

Monday, January 28, 2013

Ombré Quilt Finish!


Over the week-end, I was able to finish up my Ombré Quilt with plenty of time to spare.  I spent much of Saturday at a swim meet, and most of Sunday cleaning and organizing, so I'm a bit late blogging about it...

It was created for Project Quilting's second 2013 challenge, making a project with white and one other color.  I originally wanted to make a full size bed quilt, with the only scrap bin that was overflowing, my blue bin.  After spending a few hours ironing and cutting out squares, I decided that there was no way I'd meet the deadline.  I was cutting out 4 inch squares, so I turned to my smaller than 4 inch squares, and downsized.  This quilt is only 22 by 17 inches, made up entirely of finished 1.25 inch half square triangles.

I've been wanting to make an ombré quilt for several months now, and this was the perfect opportunity.  I LOVE the color gradations in "ombré".  It reminds me of nature... water at a beach, sunrise and sunset, Spring and Fall leaves...

I also enjoy trying out new techniques with these challenges... the short time and small projects are a perfect opportunity!  I made an invisible binding based on this tutorial that I saw on Felicity Quilt's blog a while back. I LOVE the result, and will for sure be doing this again!!

As usual, I used 50 weight Aurifil thread to piece the quilt.  I rarely use anything else these days for piecing.  I like a heavier 40 weight thread for quilting, but in this case, decided that the 50 weight looked better, and with my new Janome that quilts with any thread I put into her, I was able to do all of the quilting with my Aurifil thread!!  I made simple "waves" across the quilt, as this reminds me of water. I can not tell you how happy I am to finally be able to use any type or brand of thread to free motion quilt!!

I am starting to build up a small collection of Aurifil thread, and since the spools are taller, I also spent a bit of time this week-end making up another thread rack to hold them :-).  I used the same method outlined in my tutorial last summer, using the 4 inch pegs.

This week, I'm hoping to finish up my quilt for Shanna's "A Lovely Year of Finishes" link up, and the will be looking forward to PQ challenge #3!

Tuesday, November 27, 2012

On Cloud 9! My 3DTP is a Winner!!


I just found out this morning that my "3DTP" quilt won 2nd place in Sew Sweetness' Tula Pink Sew Along!!!!  I am beyond thrilled and surprised!!  I got to give Tula Pink credit for her beautiful fabrics!!  They really made the quilt!  Considering that Tula Pink picked the winners herself, is even more exciting!

Thank you, thank you, thank you Tula Pink, Sara, and all of the sponsors for holding this sew along!!  My quilting library will double with this prize, my ruler collection will more than quadruple, I'll be making another thread storage box, and I've never even seen the bias tape maker in action.  I can't wait to see the patterns too!! How amazing!!!

Several people have asked how I made this quilt, and if I used a pattern, so I thought I'd share a quick "pattern" right here, since I made it up myself.  Tula Pink is also giving away free patterns this week!!!!
I started with 3 yards of the background fabric (you may be able to get away with less, but this was plenty for the front with lots of fabric left over), and 1 yard of the gray fabric (again, you may be able to get away with less), plus 8 fat quarters of Tula Pink The Birds and The Bees fabric.
I sub cut the fat quarters into 4,    8.5 by 8.5 inch squares.  There are 30 squares in the quilt top, so you could easily use 30 different fabric squares too.  I had 2 left over squares, from the 8 fat quarters, which I put on the back...

I cut the gray fabric into 2.5 inch strips (width of fabric).  I'm afraid I didn't write down how many or take any pictures.

I then sub cut these into 30,   2.5 by 6.5 inch rectangles and 30,   2.5 by 8.5 inch rectangles.

I also cut out a few 2.5 inch (width of fabric) strips of the background fabric, and sub cut these into 60,    2.5 by 2.5 inch squares.

I then sewed a small background square onto each of the grey rectangles, then sewed the shorter pair onto each of the large center squares, then sewed the larger gray/lavender pair onto that.  Make sense?  Again, sorry I don't have any pictures, but here's one of the finished blocks "auditioning" sashing widths...

I decided to go with 3.5 inch sashing strips cut from the background fabric (3 inch finished), but putting them closer of further apart looks great too.  I'm afraid Google just decided right now to tell me that I've run out of picture space for my blog and now have to pay extra to add more  Boooo......

I hope that there's enough pictures and information above to make one of your own!!  I've had more than a few comments telling me that husbands really like this pattern.  I love it because, like me, it's very geeky!

Finally, considering our crazy last few last weeks with a stolen credit card and both of our vehicles in the shop, this surprise was such a welcome change!!  We're back on our feet pretty much now, and this gives me a great "forward push" again!!  Thanks!

Saturday, October 13, 2012

Firefly / Bee / Bug Block Tutorial

I've had a few people ask me to make a tutorial for my firefly block.  I made the mini quilt last spring as part of a challenge group, but I did not have any pictures of the process.  It is also 24 by 24 inches.  I knew right away that it'd have all sorts of possibilities of using fabric to make all sorts of bugs... ladybugs, bees, even flies.  Recently, while working with Tula Pink's "birds and bees" fabric line, I just couldn't resit using some of it to make up a new smaller 12.5 by 12.5 inch quilt block.  I took pictures and wrote down all of the steps just for you!

I got to let you know before I start, though, that after I finished, I didn't like the head that much, so ripped part of it apart, and added bigger "corners".  All of my pictures reflect the first one but I'm not going to redo the whole entire tutorial.

As with anything, there are many ways you could make this.  It's really a 9-patch block, as you'll soon see.  A fat quarter of all of the fabrics is more than enough.  It'd work well with scraps or even charm squares too.

First, cut the following pieces from the white, or background fabric:

2   4.5 x 4.5 inch squares

1   4  7/8  x 4  7/8 inch square

2   1.5  x 1.5 inch squares  (I used 1 by 1 originally, but they were too small)

3   4.5  x  2.5  inch rectangles

4   2.5  x  2.5  inch squares

Out of the "wing" fabric cut:

1   4  7/8  x  4  7/8  inch square

3   4.5  x  2.5  inch rectangles

2    2.5  x  2.5  inch squares

For the head and body (abdomen and thorax?), it just depends on your design, but you'll need a total of:

4    4.5  x  2.5  inch rectangles
          For the firefly, I cut 1 in orange, 3 in yellow.  For the bee, I did 2 yellow, 2 of the dark    print.  You could also do all 4 in one color, if you wanted the entire body to be the same color.

First, cut the  4 7/8 inch squares in half diagonally, then sew them together, right sides together to make a half square triangle.  Press open.

Next, add the white corners to the "head" piece of fabric, sewing diagonally on the same side, opposite direction, as pictured above.  Remember that these should be 1.5 inch by 1.5 inch.
Trim the corners and press open.


Next, take the 2 yellow rectangles (or 2 of the body rectangles), and sew "flying geese" units out of them, by sewing the 2 white 2.5 by 2.5 inch squares on one, and the 2 "wing" 2.5 x 2.5 inch squares on the other one.  Trim corners and press open.  I hope that's clear... 
Sorry, I forgot to take a picture of the second one.


Take 2 "wing" 4.5 by 2.5 inch rectangles, and 2 white or background 2.5 by 2.5 inch squares, and sew the squares on through the diagonal.  It's important to do it in the OPPOSITE direction, as pictured.  Trim and press open.

You should now have pieces which look like the above picture.

Sew all of the "rectangle subunits" together to make the 9 blocks that will make up the 9-patch block, as seen above.

Now all you do is sew together all 9 blocks for the finished block!!
I sure hope all of this made sense.  Please leave me a comment if you have any questions, or if you find any problems.  Thanks!!